Miniature Speakers ***CROCHET PATTERN***
Making the speaker box:
Materials:
2 ply acrylic yarn (black)
3.5 mm crochet hook
Polyfil stuffing
Square top (make 2)
- Rnd 1: Ch 8
- Rnd 2: Sc in second chain from the hook, sc in the next 6 chain spaces. Ch 1, turn
- Rnd 3: *Sc in the first sc and in the next 6 sc. Ch 1, turn*
- Next rounds: Repeat from * to * until your piece looks like a square. Depending on the type of yarn and the hook used, the number of rows needed to make a square may vary. With the yarn and hook that I used 7 rows were enough to produce the desired square piece.
- Finish off. Weave in the ends and cut any excess yarn.
Rectangle side (make 4)
- Rnd 1: Ch 8
- Rnd 2: Sc in the second chain from the hook, sc in the next 6 chain spaces. Ch 1, turn.
- Rnd 3: *Sc in the first sc and in the next 6 sc. Ch 1, turn*
- Next rounds: Repeat from * to * until your piece looks like a rectangle. Depending on the type of yarn and the hook used, the number of rows needed to make the desired rectangle may vary.
- Finish off. Weave in the ends and cut any excess yarn.
Connecting the pieces
- Crochet the 6 pieces together using the black acrylic yarn.
- You can choose to sew the pieces together but the edges of the box are more defined and straight when they are crocheted.
- Before closing the box shut, stuff it with polyfil.
Making the round grills
Materials:
Bamboo yarn (black and grey)
3 mm crochet hook
Yarn needle or hot glue
Small circle
- With black, make a magic circle
- Rnd 1: Chain 1 and work 7 sc in the circle
- Change to grey
- Rnd 2: Work 2 sc in every sc around
- Connect with a slip stitch to the first sc in the row. Finish off.
- Weave in the ends and cut any excess yarn.
Large circle
- With black, make a magic circle
- Rnd 1: Chain 1 and work 7 sc in the circle
- Rnd 2: Work 2 sc in every sc around
- Change to grey
- Rnd 3: Repeat *1 sc in first single crochet and 2 sc in the next sc* until the end of the round.
- Connect with a slip stitch to the first sc in the row. Finish off.
- Weave in the ends and cut any excess yarn.
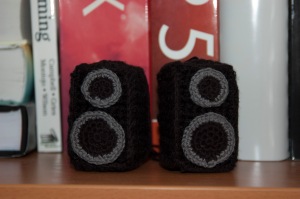
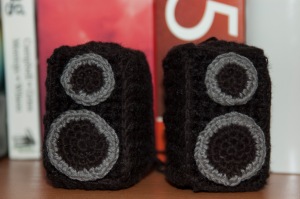
Attaching the grills
- Pick a rectangle side of the speaker box where you want to attach the speaker circles.
- Follow the diagram below and either sew or glue the circles onto the box.
ENJOY!!
Uses for these little speakers:
~Hang them on the rear-view mirror in the car.
~Place them on your desk at home or at work.
~Have a audio-enthusiast friend? This would make a great gift for them.